


Exploring Waxahachie apartments for rent? Once you settle in, nothing creates a more intimate ambiance than a candle-lit dinner. And for a touch of coziness in the bedroom, scented candles are unmatched.
Candles are far more than mere emergency lighting solutions during power outages—they help transform any living space into a sanctuary of warmth and comfort. Additionally, they envelop your home with calming fragrances, perfectly enhancing a peaceful atmosphere.
However, high-quality scented candles often come with a hefty price tag. Moreover, finding that ideal fragrance usually involves sifting through numerous catalogs.
By crafting your own candles at home, you can personally select your preferred scents, colors, and containers. Keep reading to learn how you can embark on the journey of making your own scented candles.
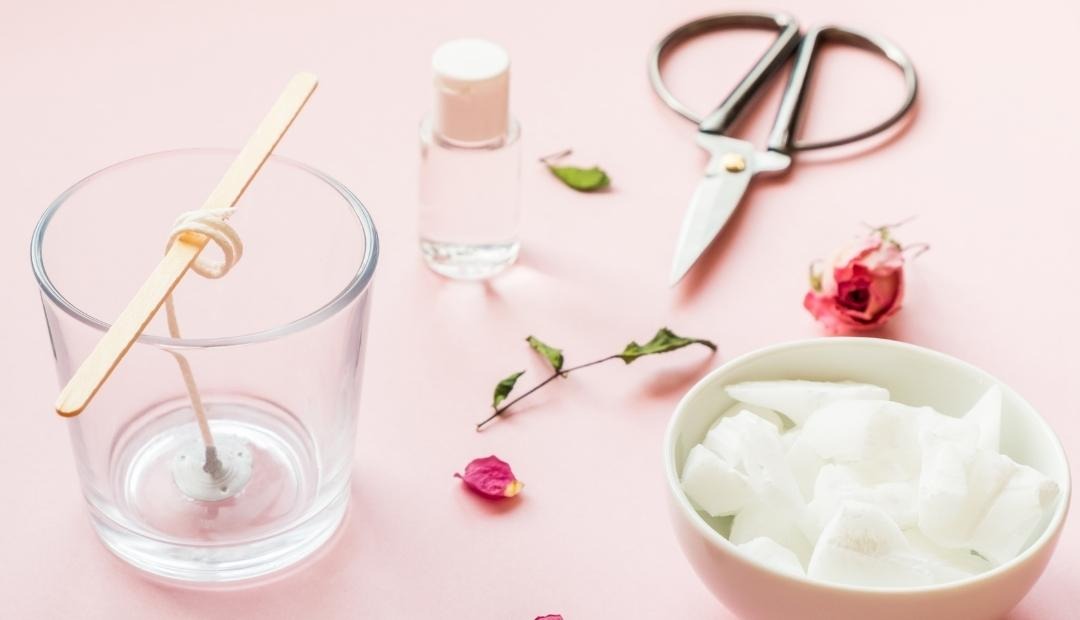
What You'll Need
Tools
- Pot
- Heat-proof bowl or measuring jug
- Weighing scale
- Spatula
- Wick holder or chopsticks
- Candy thermometer
Materials
- Wax (paraffin-soy blend, soy, or paraffin)
- Cotton wicks
- Hot glue or wick stickers
- Heat-proof candle container (glass jar, tin, or candle mold)
- Fragrance oil
- Dye (optional)
- Small glass containers for fragrance oil and dye
- Paper towels
Instructions
1. Measure Your Wax
Place a jug or bowl on a weighing scale and tare the scale. Then, gradually add the solid wax until you reach your desired candle weight. Make sure that it fits your chosen container (e.g., 1-ounce wax for a 1-fluid ounce jar).
2. Melt the Wax
Put the pot on a stove, fill half of it with water, and bring to a simmer. Next, place the wax-filled jug or bowl on the pot and let the wax melt. Stir occasionally.
3. Prepare Your Container
As you're waiting for the wax to cool down, start preparing your container and wick.
Wash your container first with soap and water. Then, wipe it dry with a paper towel and place it on a flat surface.
If you're using multiple jars or tins, make sure they're a few inches apart.
4. Secure the Wick
Add hot glue or a wicker sticker to the bottom of the wick tab. Next, push that end of the wick onto the center of your container. Hold the wick until the glue dries completely.
Use a wick holder to center and secure the wick. If you don't have a wick holder, you can use chopsticks and place the wick between the pair to keep it in place.
5. Add the Fragrance and Color
Weigh the recommended amount of fragrance oil and dye in separate small glass containers.
Use a candy thermometer to measure the temperature of the wax. When it reaches 175 °F, you can start adding the fragrance oil. Stir for a couple of minutes.
6. Pour the Wax
Grab the thermometer again to measure the wax's temperature. It should be around 130 °F before you start pouring it into your container.
Use a spatula to slowly pour the melted wax out of the jug or bowl and toward the center of your container. Let it flow outward and continue pouring.
Make sure that the wick is fixed at the center. Then, allow the wax to cool.
7. Trim the Wick
Wait for about 24 hours to let the wax set completely. Then, trim the wick down to size and enjoy your scented candle!
Oxford at Crossroads Centre Apartments in Waxahachie, TX